1/18th Custom Diecasts

Vehicle models, character models, commercial kits, custom kits, and so on.
Post Reply
ramfett
Posts: 60
Joined: Sat May 07, 2011 7:12 am
Location: Wauwatosa, WI

1/18th Custom Diecasts

Post by ramfett »

Hello, all. This is my first post after having read up a lot on this forum. I've been a big fan of the Mad Max movies for the last 6 or 7 years, but I never really did any modelling projects based on them. I do love the aesthetics of tough, weather beaten machines though, so the MM universe fits right into my interests.

I collect mostly diecast race cars and muscle cars. My preferred scale for muscle cars is 1/18th. I bought the 1/18th AutoArt Interceptor and within a week I decided to weather it. I wanted some more MM cars to display it with, so I've made a few customs from various 1/18 diecasts.
Here are some pictures of cars I've done so far, including some explanation of how I did each one. There will be more to come.
Image
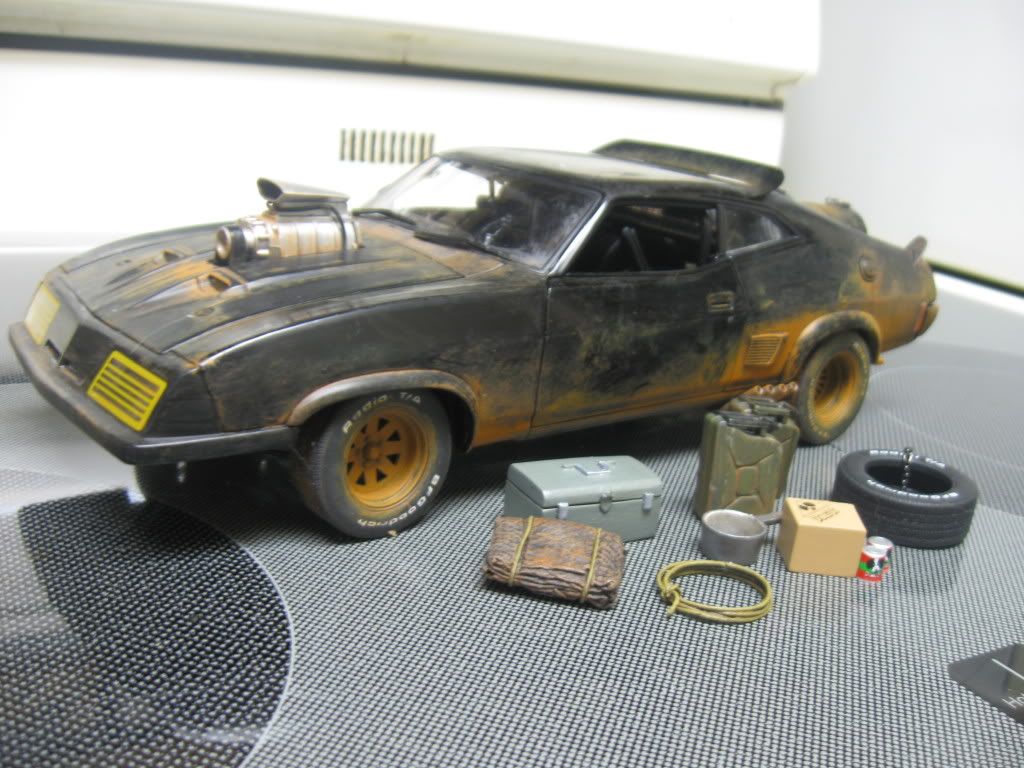
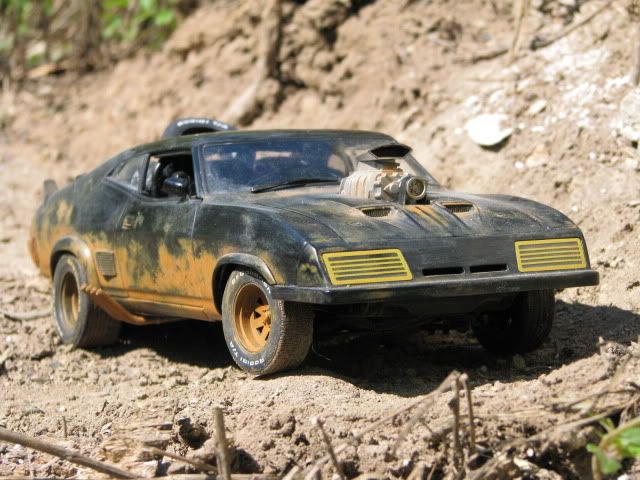
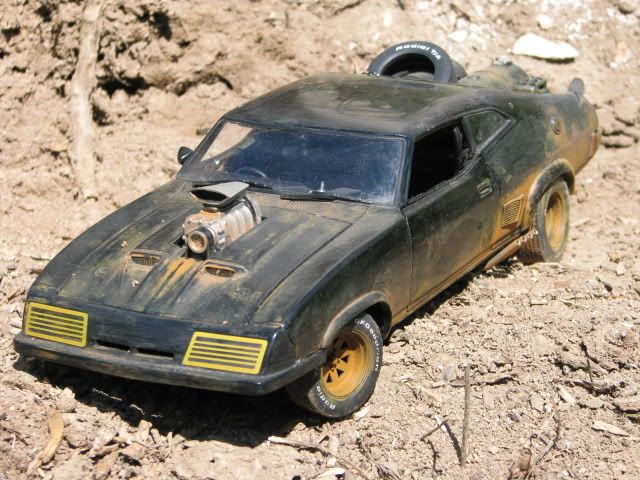
Here's the stuff I did to my AutoArt 1/18th Interceptor. Just basic painted weathering to match the on-screen car, which included painting the gas cans green. I also scratchbuilt some little odds and ends to throw inside, including a toolbox, tarp, and a rope. The cooking pot came from an old Star Wars diorama kit.
Image

Image

More shots of the weathering, these ones I setup in my backyard.

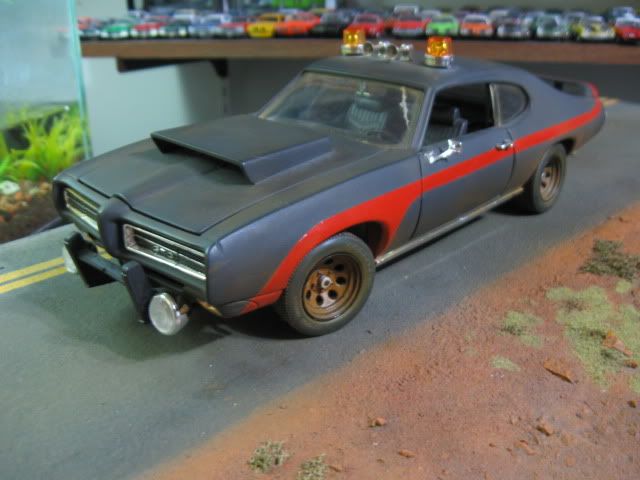
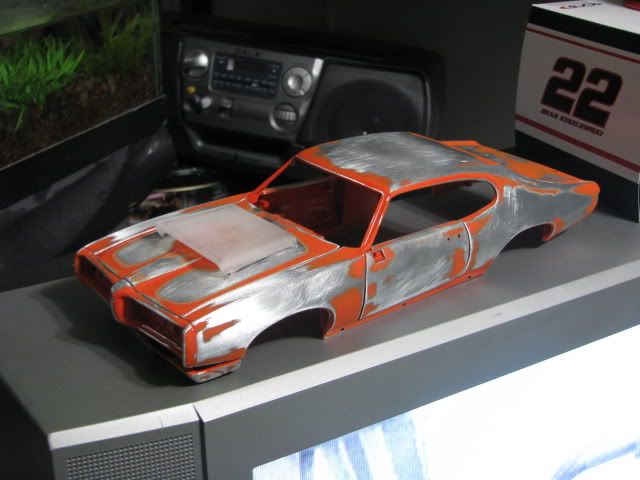
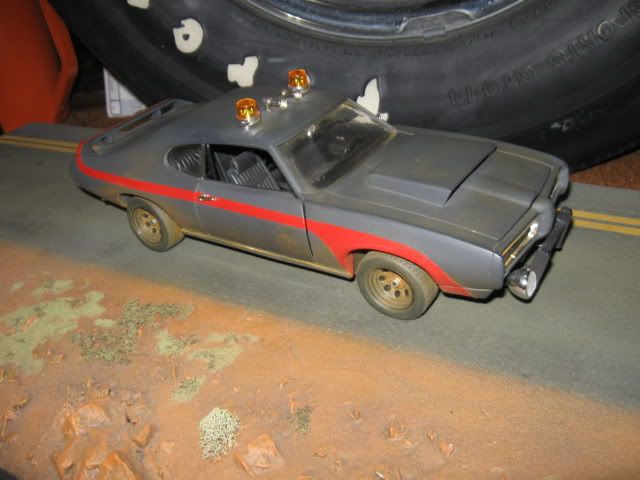
My first real project car was based on a 1/18th Ertl 1969 GTO Judge kit, I planned to turn it into a marauder car. Working from a kit was nice, since usually I have to butcher a lot of stuff to get a pre-made diecast apart to properly customise it.

Image
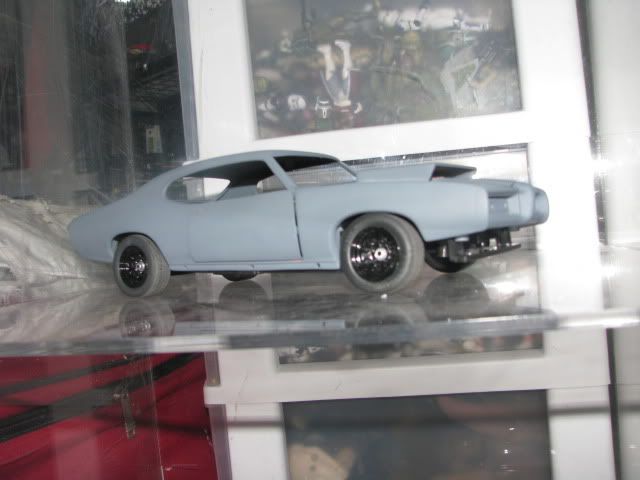
The first thing I did was sand down the carousel red it was painted in and add a hoodscoop, which I made out of a 1/64th car display case that I cut down.
Image


Image

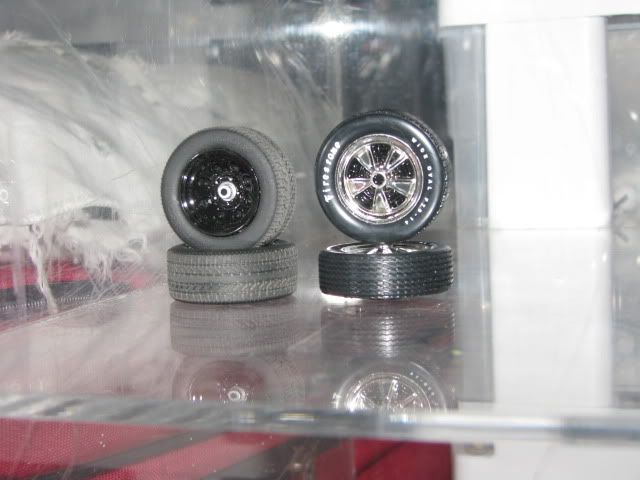
After that the car was primed and made ready for paint. Somewhere along the line I decided I didn't like the wheels and wanted something more rugged looking. I got a set of GMP Cragar Soft 8 steel wheels that look much tougher in my opinion, more befitting of a MM car.

Image
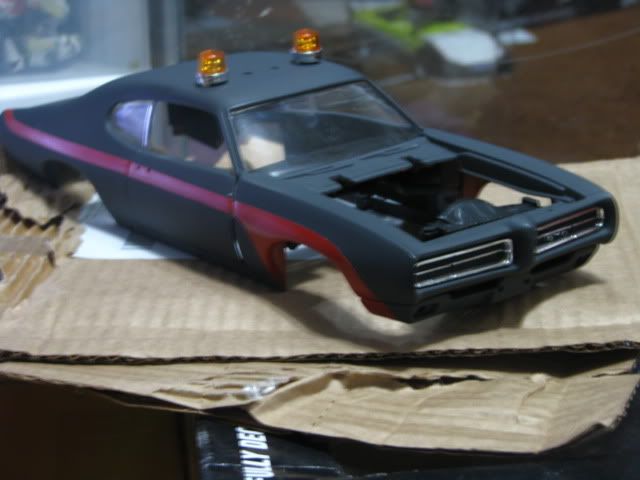
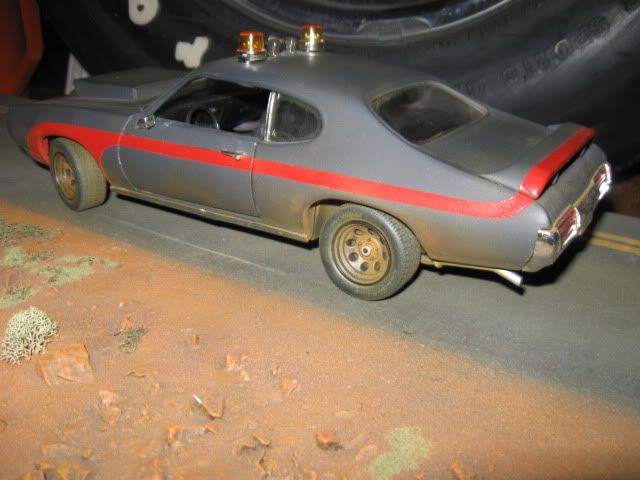
I ended up painting it similar to the Force 10 chargers in the Road Warrior dull gray with a red stripe, tweaked to better fit the bodystyle. It also got a pair of strobes that were 1/24 "bubblegum" police lights on the roof and airhorns, made from lionel train parts. I really wasn't going for a specific car here, so it's by no means intended to be movie accurate. I just wanted a U.S. muscle car that looked like it could have fit in with the other bad guy cars in Humungus' armada. I use Rustoleum and Krylon primers on metal cars, painted with Testors acrylics top-coated in Testors clear Lacquers.
Image
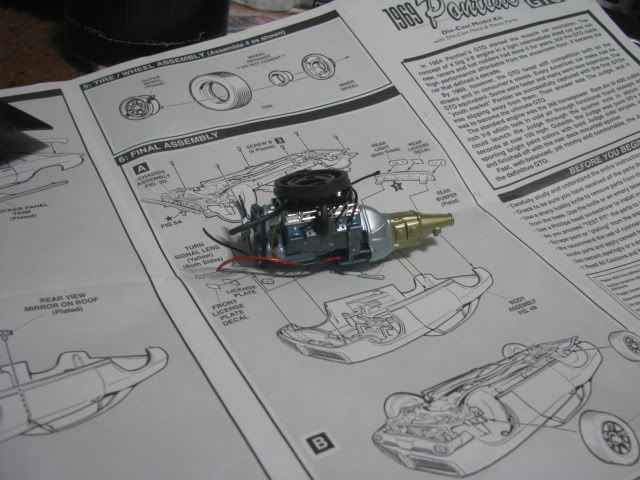
After the body was completed, the interior, chassis and motor had to be put together. I detailed the Ram Air 455 with extra wiring and plumbing that wasn't included on the kit.

Image
Image
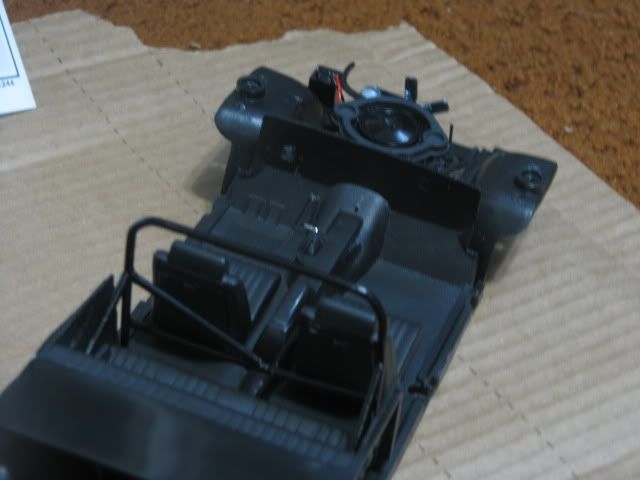
For the interior, I sadly decided not to attempt to convert to RHD. I did, however add a rollcage that I scratchbuilt from Evergreen styrene tubing and brass wire.
Image
Image
Image
After final assembly I added some more details, including a resin 1/18 police pushbar and some extra headlights, that came off an Ertl '34 Ford. After that I weathered the whole thing.
Image
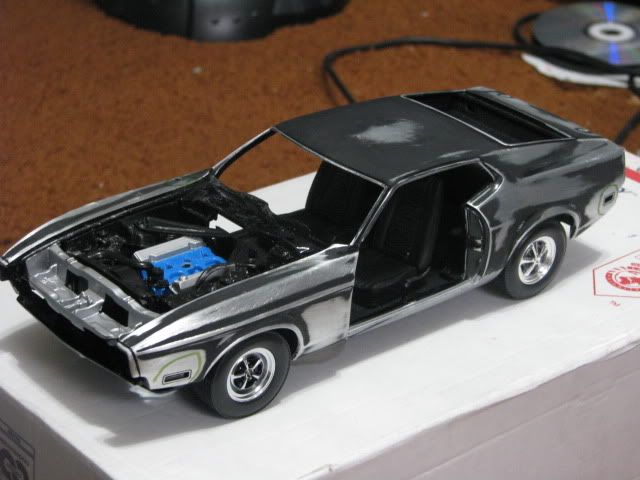
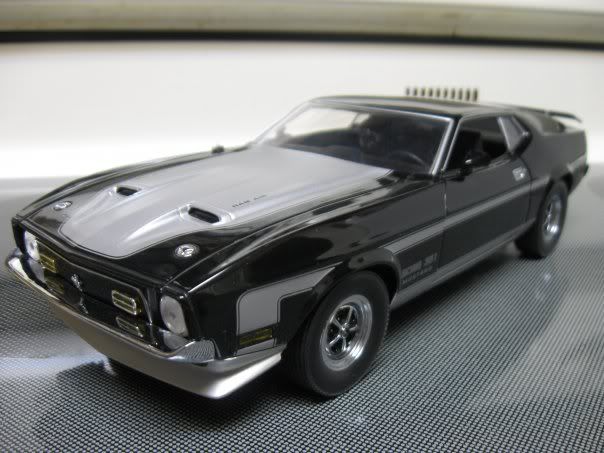
My next project is a still in-progress Red Bat XA. That one I made out of a SunStar 1/18 1971 Mustang Mach 1. Here is a picture of the victim...more to come soon.
Image
User avatar
aussie muscle
Posts: 969
Joined: Tue Apr 18, 2006 7:00 am
Location: Bombala Australia

Re: 1/18th Custom Diecasts

Post by aussie muscle »

they look very nicely done. it makes a world of difference having a bit of real world weathering.
the 71 mustang could be done as the Landau
Image
ramfett
Posts: 60
Joined: Sat May 07, 2011 7:12 am
Location: Wauwatosa, WI

Re: 1/18th Custom Diecasts

Post by ramfett »

aussie muscle wrote:they look very nicely done. it makes a world of difference having a bit of real world weathering.
the 71 mustang could be done as the Landau
Thank you! I'd love to tackle the Landau in 1/18th scale (it's such a badass looking car), which would require a lot of scratchbuilding no matter what base car I go with. I've been toying around with the idea of using a 71 Torino as the base. I need to finish some other projects before getting into that one, though. :mrgreen:
Image
waynegt351
Posts: 335
Joined: Mon Apr 18, 2005 7:43 am

Re: 1/18th Custom Diecasts

Post by waynegt351 »

i like your attension to detail .. and having a good imagination is also a good bonus ! :D
speed is just a question of money,how fast do you wana go !!
User avatar
Chase Bansi
Posts: 1157
Joined: Mon Oct 03, 2005 4:35 am

Re: 1/18th Custom Diecasts

Post by Chase Bansi »

Well done! 1:18 is also one of my preferred scale. I love the detail that can be added to such a large scale. The biggest drawback is the amount of room needed to display them. I look forward to seeing what else you've got coming.
_____________________________


No matter where you go, there you are MFP 5863
Image
ramfett
Posts: 60
Joined: Sat May 07, 2011 7:12 am
Location: Wauwatosa, WI

Re: 1/18th Custom Diecasts

Post by ramfett »

Thanks very much for the kind words, guys. I love detail in the models I buy and I try to put as much in as I can into the ones I make. Because if that, I really love 1/18 scale. But it can definitely be a challenge to find parts, selection is not nearly as varied as that of 1/24 scale.

So, as promised, here is the Red XA from the Road Warrior that I'm working on. I'd say as of now it's around 70% finished. I'll explain what I did from the beginning.

Image
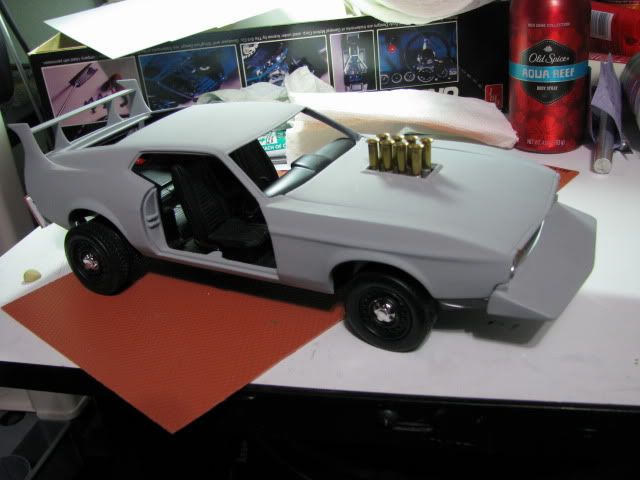
First the body was removed, stripped of lights, bumpers, trim pieces, windows, etc. and sanded down. Next the hood came off and I cut out the hole for the velocity stacks.

Image
The next thing I did was mix up some bondo and fill in holes from the trunk lock, hood scoops, turn signals, and antenna. Then those got sanded down. The nose scoop I made out of styrene. The grille/nose scoop seen here was abandoned and later re-worked as one modular piece that fit onto the front. The velocity stacks are made from some brass eyelets I found at a hobby shop glued to styrene tubes attached to a sheet styrene base. Also seen here are the new wheels I added, they are full-moon wheels from a Ford Crown Victoria police interceptor. If I can find some better RWD offset wheels closer to the movie, I will be replacing them. I used some old tires from another project for the dualie setup in the back.

Image
I decided the ride height and stance of the car was all wrong, so I did some mods to the chassis/suspension parts to lift the back a little. I converted the interior to RHD, which was made fairly easy by the design of the dash. I cut out the steering column and gauges, drilled holes on the right and glued them in, covering the holes on the left with a styrnene filler panel. The gas/brake/clutch pedal assembly were relocated to the right as well, thankfully they were all molded in one piece. For the body, I scratchbuilt the wing from styrene, pinned and epoxied it to the back of the car and used a lot of putty to smooth the joint to the body. Some small mods were made for the tail light panel and rear bumper for the guards to fit. Then I used automotive filler-primer in successive coats, sanded down to give the bodywork a seamless appearance.

Image
Some more small stuff was added, mostly work on the grille/nose scoop. It's not visible here, but I used brass screen and styrene to better approximate the XA Falcon grille. Next i taped everything off and shot the first coat of red.


Image
Image
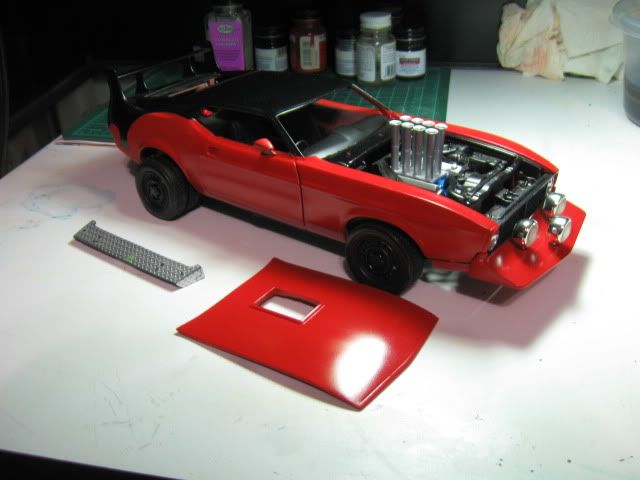
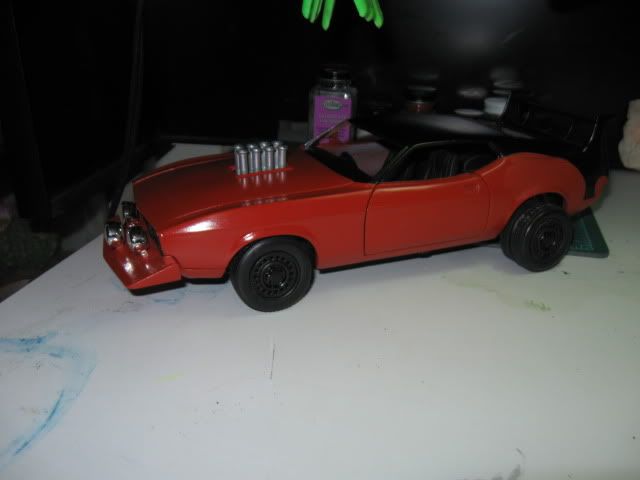
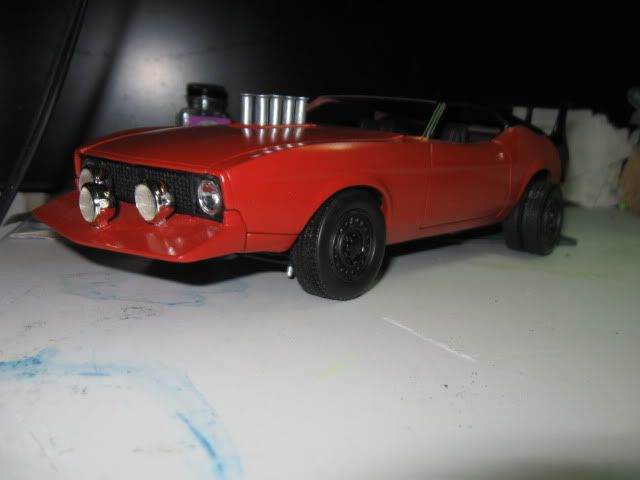
After airbrushing another coat of red, followed by a protective coat of clear lacquer, I painted the black batwing shapes by hand. This is the revised design I settled on for the grille/nose. The extra lights on the nose were made from '34 Ford headlights, I'd still like to cut them down a bit thinner.

Image
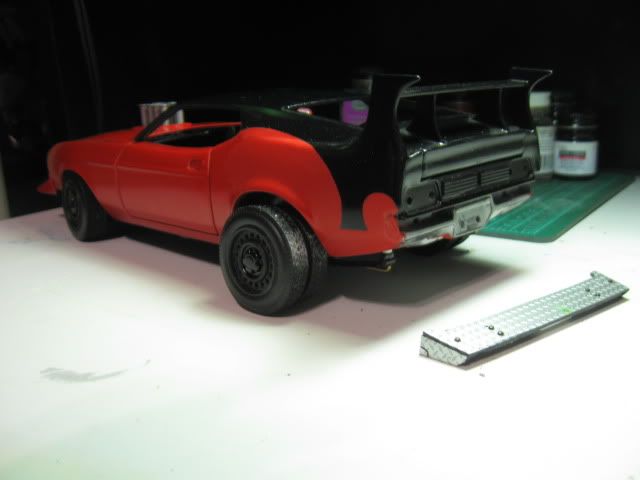
Here is a better view of the work i did on the back. The black still needs to be clear-coated, so it looks a little rough here. Next to the car is the new rear bumper guard. This is the second take on this part, I decided to re-do it in a more accurate diamond-plate material I got from a 1/64 car display base.


Image
Image
This is the car as it exists now. Still plenty of work to go but it's beginning to take shape. Remaining work includes some final paint (especially the bat on the hood), engine wiring, minor tweaks on the stance/ride height, adding a driveshaft, and of course, building a set of zoomies to add onto the exhaust. Then everything will be weathered.
Image
User avatar
HUMVEE Driver
Posts: 1316
Joined: Sun Oct 17, 1999 4:18 am
Location: Detroit area, USA
Contact:

Re: 1/18th Custom Diecasts

Post by HUMVEE Driver »

THAT... is some truly top-notch work. I'm going to be following your progress with interest!

The space between the door and the rear wheels seems awfuly slim. How are you going to work out fitting the exhaust pipes in there?

Would you mind if I posted your work on my website, www.madmaxmodels.com?

Also, you don't seem to need help with any painting, but I have a bat decal for the red XA. You're welcome to use it.

http://www.madmaxmodels.com/redxadecal.html

Thanks for sharing your work!

HUMVEE Driver
"I'll see you on the road!"
http://www.madmaxmodels.com
ramfett
Posts: 60
Joined: Sat May 07, 2011 7:12 am
Location: Wauwatosa, WI

Re: 1/18th Custom Diecasts

Post by ramfett »

HUMVEE Driver wrote:THAT... is some truly top-notch work. I'm going to be following your progress with interest!

The space between the door and the rear wheels seems awfuly slim. How are you going to work out fitting the exhaust pipes in there?

Would you mind if I posted your work on my website, http://www.madmaxmodels.com?

Also, you don't seem to need help with any painting, but I have a bat decal for the red XA. You're welcome to use it.

http://www.madmaxmodels.com/redxadecal.html

Thanks for sharing your work!

HUMVEE Driver

Thanks very much! This has been a long process in building this car, though admittedly it has been an off and on project. I'm sort of in the home stretch now, but there are a few challenges that I'll have to figure out before I can call it done.

As for the zoomies on the side, I've figured out that I can squeeze them in, made out of .125" styrene tube (same diameter as the velocity stacks). This is part of why I raised up the suspension on the back of the car, it allows a bit more of a gap so the pipes aren't up against the tires, and the doors will still clear to open. It was one of the biggest drawbacks I've encountered in going with a '71 Mustang as the base car. I'm more concerned with tying them into the exhaust in a realistic manner.

I love the madmaxmodels.com, it's been a great resource to me! I'd be honored to see my stuff on there.

Thanks for offering the decal to use. I'm going to try having a go at painting the bat myself first, but failing that, I'll be sure to try the decal.

As for sharing my work, the pleasure's all mine. Thanks!
Image
User avatar
Big Bopper Bart
Posts: 4910
Joined: Sun Aug 15, 1999 3:50 pm
Location: The ruins of South Florida!

Re: 1/18th Custom Diecasts

Post by Big Bopper Bart »

HOOOOLYYY SHIIIT dude,you have some top notch skills man! :o :o :o The GTO all gray reminded me of the 2004 Punisher one. As for the Red XA Bat car I noticed you used cop crown vic rims,May I suggest the rims off this Image since it has the actual rims used on the movie car? You can prob snag one off EGay for cheap? Also you don't need to clear coat it as the pic reference you have is a car built by a member by the name of Dee Vyper and he made his replica all shiny and purty :P compared to the rough looking one form the movie.
ImageNo.1 HELL RAISER on the MAD MAX Movies forum for over 10 years now !
ramfett
Posts: 60
Joined: Sat May 07, 2011 7:12 am
Location: Wauwatosa, WI

Re: 1/18th Custom Diecasts

Post by ramfett »

Haha, thanks, Bart! I'll look into finding a cheap '69 Talladega, it would at least be worth a try. I can likely do a tire swap and put some fatter tires on these rims after they're painted black. That would definitely be an improvement over the CVPI wheels, which I wanted to replace anyhow. Hell, I might even use the rest of the Torino as a project base for another post-apocalyptic monster! :twisted:

I do still plan to clear coat, both as protection for the base paint and in order to start off with a smooth, new looking car and weather it down from there (the movie car did have a bit of shine in some spots). Then, after everything's protected, I'll spray a coat of matte or maybe a mix of matte & gloss in the right places before weathering in the dust and whatnot. Dee's replica car is AWESOME, the pics of that car are the best I could find as reference for some of the body details, particularly the nose and spoiler.

Thanks for the tips and encouragement, they are much appreciated!
Image
Post Reply