Page 1 of 2

From GameStop POS Magnum Opus to Razor Cola in 1/64

Posted: Fri Jan 04, 2019 1:58 am
by Cpl Punishment
I am embarking on a personal project to make a Razor Cola from the GameStop Magnum Opus POS (Piece Of Shit)
In case you don't know this is the car I am speaking of

Image

Image

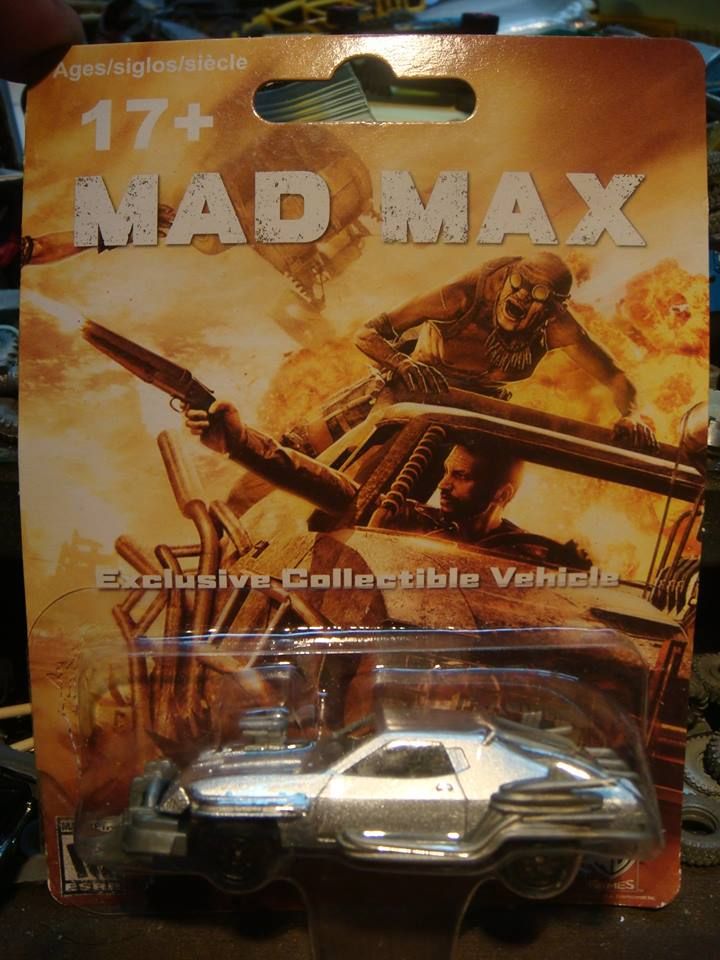
It has so many issues that I just cannot stand to look at it
but it is a good starting point for my work
to date I have actually gotten pretty far with it.
But since I only found this forum today,
I am breaking it down for posting here

Re: From GameStop POS Magnum Opus to Razor Cola in 1/64

Posted: Fri Jan 04, 2019 4:28 am
by Cpl Punishment
This is the slow transformation of the POS Magnum Opus to the Razor Cola.
There are many spots to be filled,
new lines to be cut,
as well as the back window.
I started by grinding away most of the crap
molded above the front fender well
but decided to not complete that part till later

Image


I then went to pulling off most of the BS parts,
and then changing the wheels

Image


areas to be cut and drilled are marked in back.

Image

Image

Here I filled in the unwanted holes, the misplaced panel lines
drilled new holes, and cut a new panel line
as well as the back window
and removed that crappy bumper

Image


The front wheels may be a little big,
I knew once I removed that bumper....
it would be determined that the first choice
of the wheels are "just too big"
so after a rethink ...
I have completely removed
the back wheel from the equation
moved the front wheel to the back,
and came up with a different wheel for the front.
I think the look will be much better now

Re: From GameStop POS Magnum Opus to Razor Cola in 1/64

Posted: Sat Jan 05, 2019 8:03 am
by Eldiablo78
Cpl Punishment wrote:This is the slow transformation of the POS Magnum Opus to the Razor Cola.
There are many spots to be filled,
new lines to be cut,
as well as the back window.
I started by grinding away most of the crap
molded above the front fender well
but decided to not complete that part till later

Image


I then went to pulling off most of the BS parts,
and then changing the wheels

Image


areas to be cut and drilled are marked in back.

Image

Image

Here I filled in the unwanted holes, the misplaced panel lines
drilled new holes, and cut a new panel line
as well as the back window
and removed that crappy bumper

Image


The front wheels may be a little big,
I knew once I removed that bumper....
it would be determined that the first choice
of the wheels are "just too big"
so after a rethink ...
I have completely removed
the back wheel from the equation
moved the front wheel to the back,
and came up with a different wheel for the front.
I think the look will be much better now


look at this ------

Re: From GameStop POS Magnum Opus to Razor Cola in 1/64

Posted: Sun Jan 06, 2019 12:11 am
by Cpl Punishment
Eldiablo78
many thanks for the ref pic's
I beleave I already has these.
but thank you all the same

Re: From GameStop POS Magnum Opus to Razor Cola in 1/64

Posted: Sun Jan 06, 2019 10:03 am
by Cpl Punishment
Ok before I started in the major work,
I did the second wheel swap
added the step up bar, and the exhaust pipes
I think these wheels suit the car much better

Image


I then removed the wheels and started to add putty to the works
I used Milliput for this

Image

Image

After sanding down the front a bit,
I drew out where I felt the wheel well should be

Image


Here I cleaned up the rear fender fairing,
and readded the wheels to help get a perspective
on what I am doing

Image

Image

Image

Image

this pic shows that I still have to add more putty

Image

in this pic you can clearly see that I added the air tanks to the rear like on the real car

Image

Image

Image


what do you think?

Re: From GameStop POS Magnum Opus to Razor Cola in 1/64

Posted: Sun Jan 06, 2019 11:13 am
by Cpl Punishment
As I kept looking at it.....
I realized that there are bare spots where there should be details
detail omitted by the diecast manufaturer

Image

so I took a GreenLight V-8 Interceptor and mashed clay against the side

Image

using the clay impressions as molds,
I dripped resin into the spaces and allowed it to cure

Image

Once cured I then cleaned and trimmed the parts
and then glued these to their correct locations on the Magnum Opus

Image

Image

they still need a little cleaning up around the edges,
that will wait till I have the rubber grinding wheels I need for my Dremel Tool
But here is a comparison shot of the car at the time, and what I started with

Image

there will be more later

Re: From GameStop POS Magnum Opus to Razor Cola in 1/64

Posted: Sun Jan 06, 2019 1:29 pm
by TheDarkOne#1
Nice work. I’m always amazed at what people can do with these smaller scale cars. Especially sculpting new details on them.

Re: From GameStop POS Magnum Opus to Razor Cola in 1/64

Posted: Sun Jan 06, 2019 2:03 pm
by Cpl Punishment
TheDarkOne#1 wrote:Nice work. I’m always amazed at what people can do with these smaller scale cars. Especially sculpting new details on them.
Thank You for the kind words
My personal opinion is that the bigger ones are just too easy to work on
these give me the challenge I crave

Re: From GameStop POS Magnum Opus to Razor Cola in 1/64

Posted: Mon Jan 07, 2019 9:04 pm
by Cpl Punishment
Now is when I started on the front Bumper.
I had already planned
on cutting up the front of a Greenlight V-8 Interceptor
to make a front for the Hot Wheels '73 Ford Falcon
So I chopped it off, molded it,
poured a cast, and built it up with a little Milliput to make a second mold

Image

Image

Once I had a couple resin casts of the front piece,
I shaved off the headlight area, and sanded it down till I had only the bumper

Image

Image

Image

Once this was done I glued it in place
and started to build up the left and right sides with more putty
(this time using the white Milliput)

Image

Image

I was dis-satisfied with the White
and went back to the Yellow Milliput
I also added the two "Bump / Tow" points to the Bumper as well

Image

Image

Image

Image

this is the effect over all

Image

Image

Re: From GameStop POS Magnum Opus to Razor Cola in 1/64

Posted: Mon Jan 07, 2019 10:22 pm
by Cpl Punishment
A couple of more Issues I have with the Diecast are
the head light detail and the roof extension in the back
as you can see here, the Driver's side headlight cover
is a smooth blank space

Image

Image

where as the other side has lines
to represent the razor wire the real car had

Image

Image

Being a jeweler ......
I have a few engraving tools
so I decided to make the Headlights match.
like on the real car

Image

once I finished that,
I turned my attention to the back opening,
where the top of the rear windshield should be.
On the Diecast,
they brought the opening all the way to the edge of the wind fairing on the roof

Image

so I rolled out some Milliput and corrected the top of the window frame

Image

and that's as far as I got to this point